FAQ: How to improve your Workflow
When building a workflow, the initial version of the workflow is 100% generated by AI based on the prompt you gave to the Workflow Builder Agent. It is often necessary to edit this initial version to provide more detail so the output is to the level of quality of writing, the right tone/brand voice, follows your style guide, is in the appropriate format, provides the desired insights, etc.
Understanding the workflow editor
There are a couple of different ways to edit a workflow - by editing the prompts in a step and by adding or removing steps to the workflow.
Editing Workflow Prompts
See Also:
Workflow steps
To edit a Workflow prompt, first click on the step you wish to edit in the workflow view.

This will pull up the prompts and other settings for the step in the right side-bar. Here you will see two different prompts, the “Instructions” and the “Background”.
In the Background is where you would give the AI in that step a job or a persona. You can also be very specific about the types of inputs and outputs you would expect. Providing Brand Voice instructions and k-shot examples is best in the Background prompt.
The Instructions is where the ask for this particular task would go, as well as any data inputs the AI would need to accomplish this task. In the example above you can see the Transcript input is referenced at the top of the Instructions prompt, followed by the instructions of what to do with that data. This is a best practice - data at the top of the prompt, instructions at the bottom.
In this particular prompt it is simply the labeled Transcript input followed by “Summarize the key points and details from the call transcript.”
This prompt is very open ended and leaves a lot to the imagination of the AI. I’ll get results, but they will probably be inconsistent from run to run in length, detail, and format. To edit this prompt I just need to click into the input box and type away.
If you need a new line, hold shift+return.
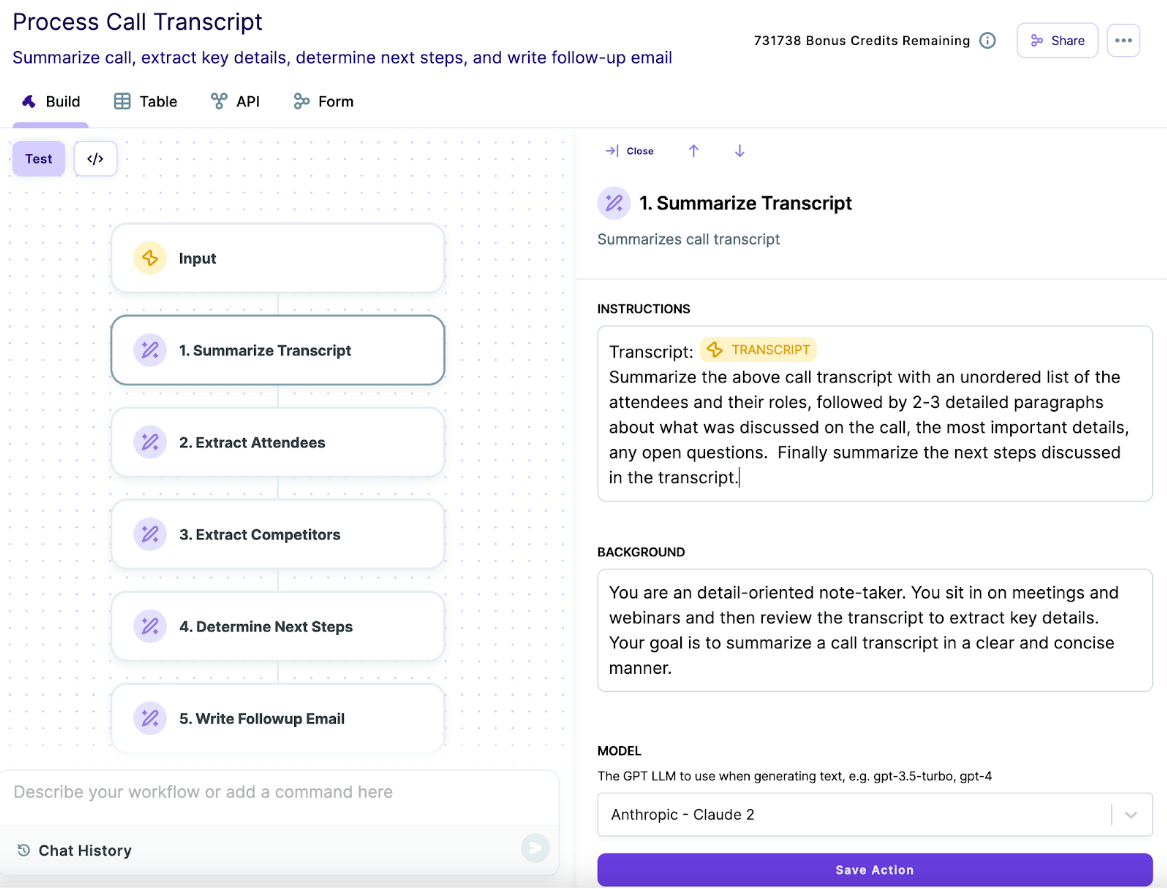
To insert additional data into the prompt from the workflow Inputs, outputs of prior steps of the workflow, or information from Infobase - type a “#” and you will see a list pop up of all the available data inputs for that step.

Once you are finished making your changes and are ready to re-test click the purple “Save Action” button below the prompts. NOTE: If you make changes to a Workflow step and click away to another step or screen without clicking Save Action first, your changes will be lost.

This creates a new draft version of the Workflow which will not affect anybody currently using the workflow via the Table, API, or Form, but will allow you to retest the changes.
If you wish to make this changes live, click the Publish button that appears above the Workflow view.
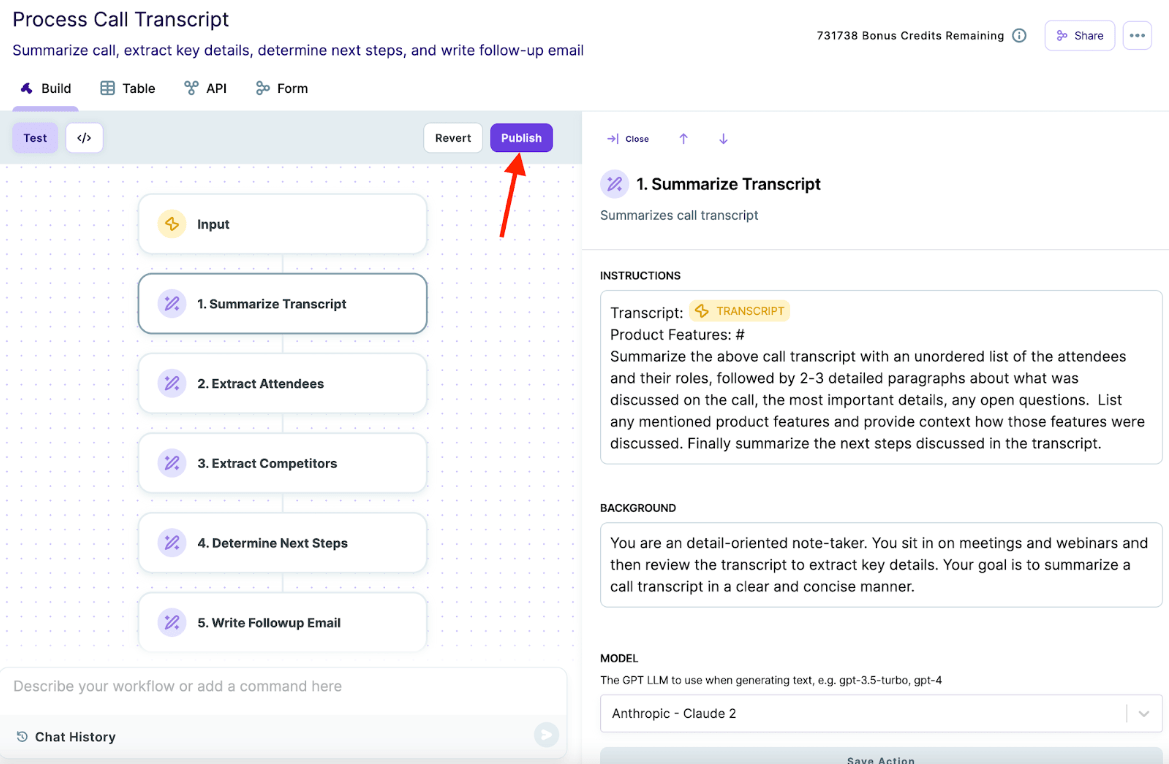
Publishing the Workflow will make your draft version Live for anyone using the workflow through the Table, API, or Form and they will immediately see the updates.
If you wish to abort the changes you’ve made and go back to the previous published state, you can click the “Revert” button.
Adding Workflow steps
Sometimes you’ll need to edit the structure of the Workflow itself. For instance you may want to add a step to the end of the workflow to apply some editorial review rules/criteria to the output, or perhaps you want to add in a Reasoning step towards the beginning, or maybe the Workflow Builder Agent added a step you don’t need to the workflow.
To edit the structure of the workflow itself, simply use the Workflow Builder Chat and describe the updates you wish to make. This example shows using instructing the Workflow Builder Agent to add a Reasoning step at the beginning of the product description workflow to think of ways this product is used. This output would then be used later on in the workflow to improve the quality of the description by including some of these ideas.
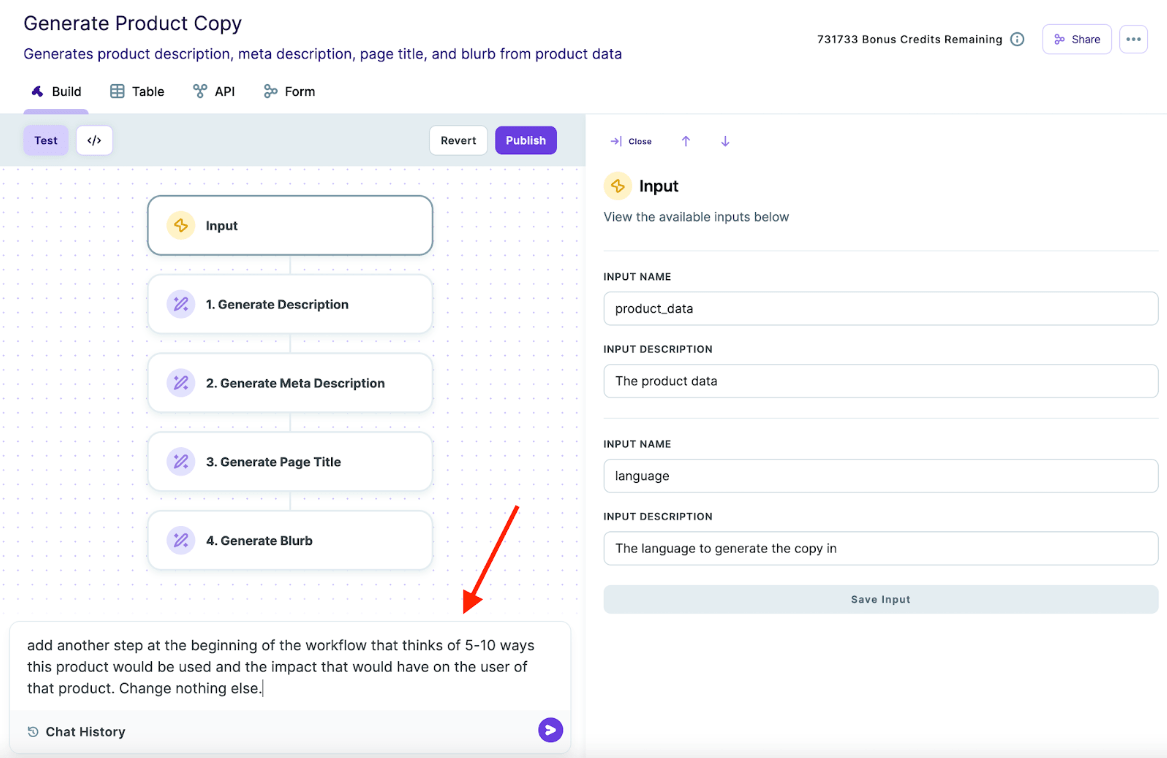
You may also notice the last bit “Change nothing else.” This can help the Workflow Builder Agent keep focused on this editing task alone and is considered a best practice to add to any editing prompts.
Here is the result of that prompt, you can see there is a new step at the beginning called “Brainstorm Use Cases”
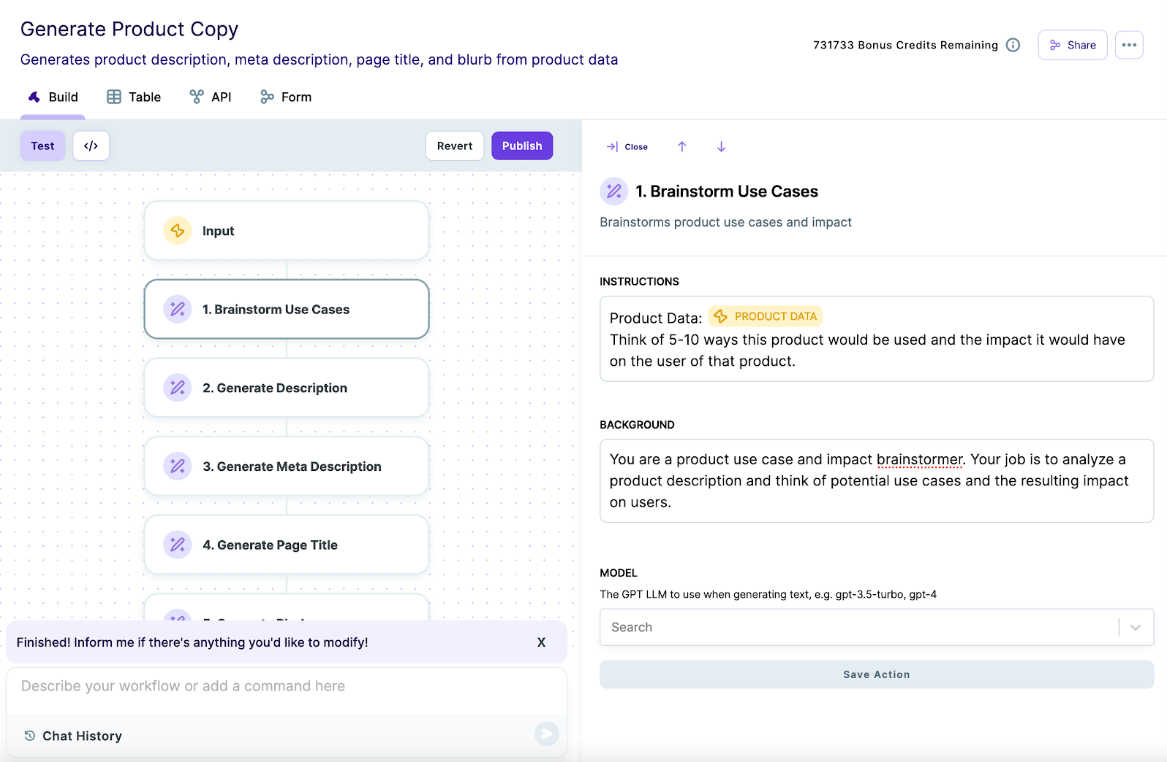
You can see that subsequent prompts were also edited to include the output from this step automatically:
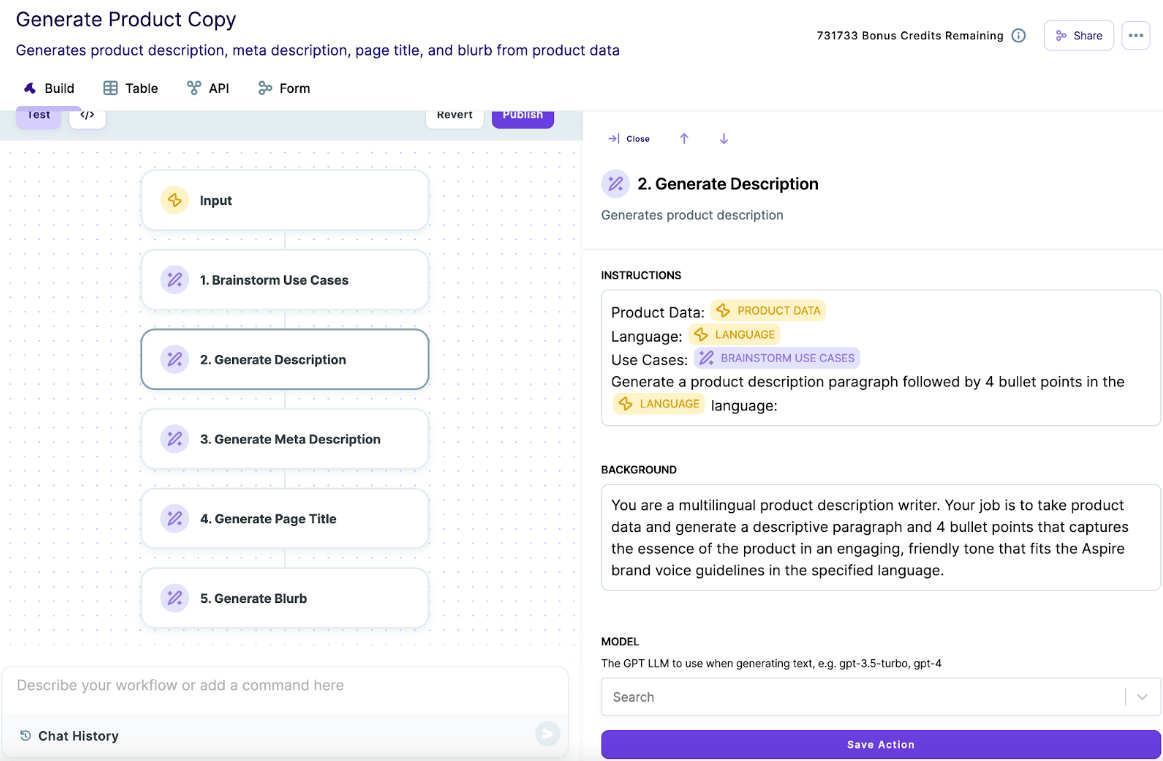
This general concept of adding discrete steps to a workflow that are each in charge of a single task is called “Prompt Chaining” and is a powerful way to improve the output quality of a workflow.
Prompt chaining refers to the process of breaking down a larger, more complex task into smaller, manageable prompts and then executing them sequentially. This technique allows the AI to focus on each sub-task individually, which usually results in generating better and more accurate content.
Instead of providing the AI with a single, complicated prompt, you create a series of straightforward prompts where the output of one prompt serves as the input or context for the subsequent prompt. This chaining helps in guiding the AI towards a more coherent final output.
Using the example above, we’ve broken this process out into several discrete steps - first we take the raw product data and think of uses for the product, then we generate the Description, then we generate the Meta Description, and finally the Page Title and Blurb. We could ask for all of these outputs in a single pass, but the quality will be much lower and the responses will be unreliable.
Removing Workflow Steps
If you want to remove a step, it’s best practice to call that step out by name and number. For instance, if I wanted to remove the final step I might say something like:
“Remove step 5 - “Generate Blurb” and change nothing else.”
Doing so updates the workflow to the following:


